
Wondering where to mount your onboard battery charger so it lasts longer and works efficiently? The key is finding a spot that stays dry, stays cool, and keeps your charger close to your batteries.
Proper placement can prevent water damage, overheating, and voltage issues.
Keep reading for tips on the best spots to install your charger for optimal performance.
Where to Mount an Onboard Charger: Start Here
Choose a dry, ventilated location that keeps the charger out of standing water and bilge moisture. Opt for a compartment with good airflow rather than a sealed space to ensure proper cooling and safety. Mount the charger higher up in the compartment to reduce exposure to damp air and humidity. Leave at least 2 to 6 inches of unobstructed space around the unit to promote airflow and prevent overheating, and never block airflow underneath. For added organization, use top zip ties to secure cables and keep them away from moisture sources. Avoid mounting directly above lead-acid batteries, near fuel tanks, or below the waterline to prevent safety hazards. Select a structurally sound surface capable of supporting the charger’s weight, preferably one suitable for vertical mounting. Ensure cables can easily reach the battery bank, AC power sources are nearby, and you can access the unit for inspection or removal without major disassembly. For wiring connections, consider using heat shrink tubing with adhesive lining to seal and protect against moisture and corrosion. Using a compatible solar charge controller can further optimize the charging performance of your Li-Ion battery system.
How Far Should the Charger Be From the Batteries?
The charger should be placed as close to the batteries as possible without compromising safety, ideally within a few feet. Shorter cable runs minimize voltage drop, ensuring the charger delivers the correct voltage and current. For example, a 30-amp charger five feet away with #10 AWG wire typically works well, but extending the distance to 15 feet may require upgrading to #4 AWG wire to prevent significant voltage loss. Using a kill switch with lanyard can provide an additional safety measure by allowing quick disconnection of power in an emergency. For reliable power safety, selecting a high-quality top post disconnect switch ensures secure and easy disconnection when needed. Always avoid mounting the charger directly above flooded or vented batteries because of the risk from corrosive gases. Instead, select a dry, ventilated spot close enough to the batteries that the wiring remains manageable. For boats using deep cycle batteries, the charger’s proximity becomes even more critical to maintain consistent charging profiles and prevent sulfation. This placement balances the need for a short cable run with proper ventilation and safety considerations.

Only suitable for SM-2P plug battery, plug end cross-scrtion size is 0.22*0.2 inch /5.5*5.0mm. Black 2 prongs plug, USB Charge cable built-in over charged protection board, it will stop charge after full charged, some red light are not off after full charged, It most take 3-4 hours can full charged 1S 500mAh , It take double time (6-7 hours )to charge 1S 1000mAh battery. Charge connector plug: SM-2P black 2 pin, only suitable for 3.7V 400mAh 500mAh 800mAh Li-ion or Lipo rechargeable small battery, don't advise use in big capacity battery,such as 1500mAh battery, it may take over 10-15 hours to full charge.

Charger, Maintainer & Desulfator - An all-weather battery charger, battery maintainer, trickle charger, and battery desulfator. Perfect for charging and maintaining all 12-volt lead-acid, flooded or sealed maintenance free batteries (AGM and gel cell).
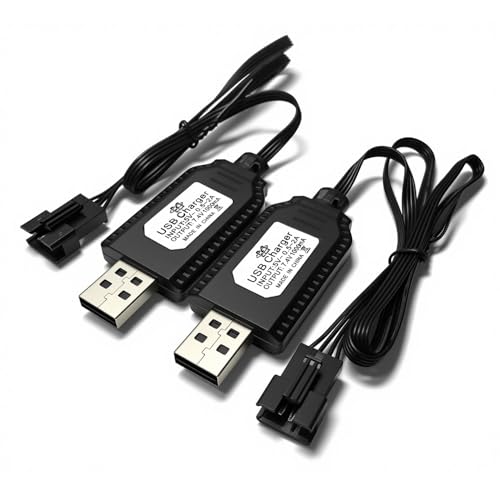
Output:7.4V (1000mA); Input: DC 5V (0.5A-2A)This LiPo battery USB charger is specifically designed for 7.4V LiPo batteries and comes equipped with an SM-4PIN PLUG.
Mount Your Charger Above the Bilge to Avoid Water
Mount the charger at least 12 to 24 inches above the normal bilge water line. This height keeps it dry and minimizes exposure to moisture, which can cause corrosion and reduce its lifespan. Elevating the unit also offers natural airflow, helping it stay cool and operate efficiently. Avoid mounting directly over batteries to prevent exposure to battery gases that can accelerate corrosion. Instead, select a dry, well-ventilated compartment. If splash or spray risk remains, add a drip shield for extra protection, but remember that height is the most effective measure to keep the charger dry and corrosion-free. For optimal performance, consider pairing it with a 12V solar panel that includes a built-in charge controller for reliable power management. To ensure the charger is compatible with advanced battery types, look for models that support lithium battery charger 12V features for optimal charging profiles. For best results when applying heat shrink tubing to any wiring connections, use a heat gun with adjustable temperature settings to avoid damaging cables.

【2 Bank Marine Battery Charger】output 12V 10A (5A/Bank) waterproof Onboard Boat Charger, which can automatically switch from full charging mode to float charging mode. Works with 12 volt batteries including marine, boat, starter, and deep-cycle batteries.
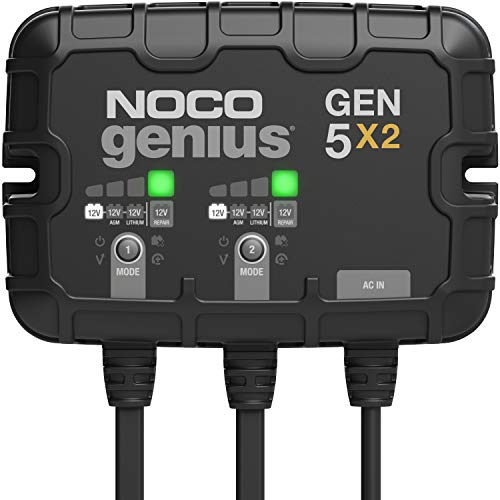
MEET THE GEN5X2 — 37% smaller and 43% more powerful than the GENM2. It’s our most compact and advanced onboard charger yet—engineered for peak performance in the harshest marine environments.
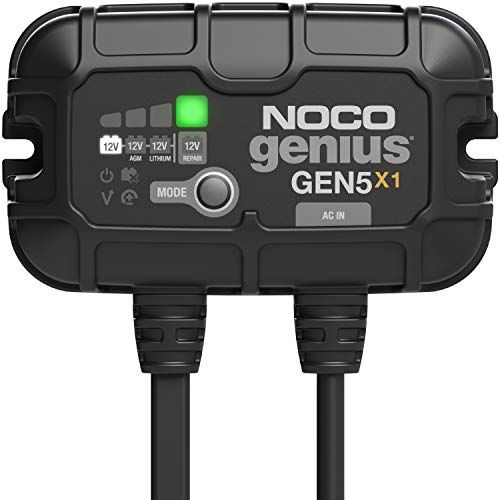
MEET THE GEN5X1 — 37% smaller and 43% more powerful than the GENM1. It’s our most compact and advanced onboard charger yet—engineered for peak performance in the harshest marine environments.
Keep the Charger at Least 2 Feet From Fuel Tanks
Keep the charger at least 2 feet away from fuel tanks, including directly from any fuel tank vent deck fitting. Specifically, maintain a minimum distance of 24 inches from the vent fitting to reduce the risk of an electrical spark igniting gasoline vapors. This 24-inch clearance applies to the location of the charger’s plug, not just the charger body itself. You must install the charger outside of gasoline engine compartments and fuel tank areas; simply placing it a few inches away is not sufficient. Installing the charger too close to fuel lines or fittings increases the chance of ignition. Using high-quality battery terminals can reduce resistance and heat, further lowering the risk of sparks in these critical areas. For secure connections that resist vibration, a heat gun for shrink tubing ensures insulation remains tight around terminals.
While your battery may be sealed, the charger still generates heat and can produce electrical arcs during operation. Proper cooling requires airflow, but ventilation must be arranged so vapors are not pulled toward electrical components. Mount the charger where you can easily inspect it without disturbing fuel system parts, ensuring wiring and service access remain clear of any hazard zone. Similarly, shore power inlet corrosion often stems from electrochemical reactions that can be worsened by proximity to damp, poorly ventilated spaces.
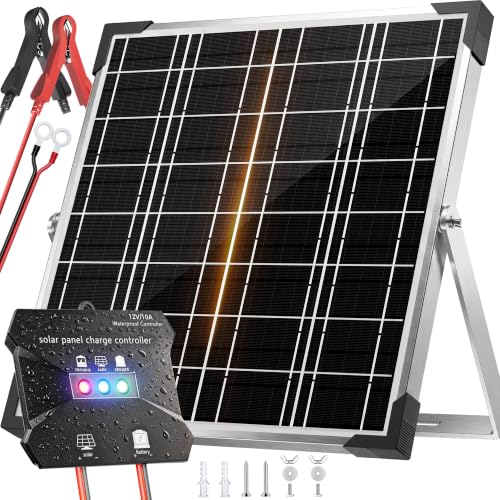
High-Efficiency MPPT Solar Charger - Advanced tracking technology delivers 20-30% faster charging for 12V batteries. A+ monocrystalline panels maximize power conversion. Perfect 20W solar trickle charger for cars, RVs, boats, and trailers. More sun captured, less time waiting.

Superior Solar Efficiency: Our 10W solar panel offers a robust solution for outdoor power needs, providing higher conversion efficiency compared to similar-sized polycrystalline and amorphous panels. Ideal for maintaining a 12V battery in prime condition

Securely holds two 27 series batteries
Choose a Flat, Solid Surface for Mounting
Choose a flat, solid surface that can support the weight and installation stress of your charger. Ideal materials include wood, fiberglass, starboard, or concrete, which offer durability and stability. Avoid soft or flexible materials like carpet, fabric, or upholstered surfaces, as they can flex under load and weaken mounting points. Hard surfaces prevent housing flexing, keep connections secure under vibration, and promote better cooling through improved airflow and convection. Always verify that the area can accommodate bolts or anchors for a firm and secure attachment, ensuring your charger remains stable and operational during use. For projects like an LS swap, selecting a best fuse block with similar mounting considerations ensures secure connections and durability under vibration. Using a crimping toolkit with quality and value can further improve the reliability of all electrical terminations in the installation. For chargers integrated with a top on/off switch with wires, ensuring the switch is mounted on a similarly rigid surface prevents accidental disconnection and enhances safety.

Input: 100-240V, 50-60Hz (for worldwide use); Output: 12V 3.58A 43W; Connector size: (ref to the picture)

Bling Plate Frame: Featuring sparkling clear rhinestones, this license plate frame shines brilliantly in the sunlight, adding a stylish touch to the exterior of your vehicle. Not only does it enhance your car's appearance, but it also makes your car stand out from the crowd and shows off your fashionable taste

Practical Function: This seat hard hat rack makes effective use of back‑seat space firmly holding daily items such as hard hats backpacks and shopping bags. It helps keep your car interior tidy and well‑organized while making your belongings easy to access
How Much Clearance Your Charger Needs for Safe Mounting
To ensure safe mounting, your charger needs adequate clearance to prevent overheating. Most manufacturers recommend at least 4 inches of space on all sides for proper airflow, though some models may accept only 2 inches. Check your specific manual to determine the minimum clearance required. Treating a tripped circuit breaker as a sign of overload or short can help you diagnose issues before resetting. Also, if your batteries are not charging properly, a faulty isolator could be a related power issue to investigate.
Above and below the charger, aim for 3 to 6 inches of space to allow natural convection or fan exhaust to dissipate heat efficiently. Front access should be considered as well, providing enough room for wiring, servicing, and future adjustments, sometimes up to 36 inches. Never mount the charger inside airtight compartments, as restricted airflow can lead to overheating and thermal stress.
Additionally, keep the charger away from battery compartments that emit explosive gases. Plan these clearance gaps before drilling or mounting to avoid tight spaces that can compromise both performance and safety. Proper spacing around your charger is essential to ensuring it operates effectively and safely over time.
Can You Mount a Charger in an Engine Compartment?
Mounting an onboard battery charger in an engine compartment is possible but requires careful consideration of safety and durability. You must avoid direct contact with engine heat and hot exhaust surfaces to prevent damage. Ensure there is at least 8 inches of clear space around the unit to allow proper airflow; blocked ventilation can cause heat buildup and shorten the charger’s lifespan. Protect the charger from corrosion by selecting a sealed, marine-rated model designed for harsh environments. Using a lithium battery tester can help verify the charger’s output voltage matches your battery’s requirements. Mount it away from moisture, salt air, and vibration, ideally in a higher position to reduce exposure to bilge heat and humidity. Secure the charger with corrosion-resistant hardware on a flat, stable surface near the battery. If these conditions cannot be met, choosing a cooler, drier location outside the engine compartment remains the better option for longevity and consistent performance. For safety, always follow the correct routing and connections for the AC and DC wires to reduce the risk of short circuits or fire. You should also regularly inspect the shore power cord connection for sparks or overheating that could indicate underlying electrical issues.
Vertical or Horizontal: Which Mounting Orientation Works Best?
Vertical mounting is generally preferred for onboard battery chargers, especially in bulkhead installations where mounting brackets can securely fasten the unit. This orientation allows for easier space management and often aligns with manufacturer recommendations. However, horizontal mounting can be just as effective, particularly because some chargers cool better in that position through improved natural convection. Always prioritize your charger’s manual, as it may specify suitable orientations. If both options are permitted, vertical mounting typically offers better space efficiency, provided you check the fan direction and ensure sufficient clearance. Horizontal mounting might suit chargers designed with side-to-side airflow in mind. Whatever orientation you choose, guarantee at least four inches of unobstructed space on all sides to maintain proper ventilation. Proper airflow and clearance are critical to your charger’s reliable operation, so do not let mounting position override ventilation requirements. Use the manufacturer-approved orientation combined with adequate space for optimal performance.

CUSTOM FIT FOR EGO 56V BATTERIES – Designed to securely hold compatible EGO 56V batteries for organized garage, workshop, or trailer storage.

Superior Material: Car battery bracket is made of high quality aluminum alloy, sturdy structure, anti-oxidation, not easy to rust or break, the surface is specially treated, glossy and bright, eliminating abrasion marks and burrs

Universal adjustable crossbar, from 13.5-20cm.
Route Cables to the Batteries Without Blocking Airflow
To route cables to the batteries without choking off the charger’s airflow, keep wire runs short, direct, and away from the charger’s intake and exhaust openings. Maintain at least four to eight inches of clearance around the unit to ensure proper ventilation. Avoid running cables across ventilation gaps or bundling them in a way that blocks natural convection.
Use separate positive and negative cables for each battery bank, securing them with cable ties along protected pathways. Do not coil excess length directly over the charger; instead, secure surplus wire to the compartment’s sides to prevent obstruction. Keep cables positioned clear of battery caps and hot surfaces to avoid corrosion and damage. These careful routing practices help the charger breathe freely, ensuring optimal airflow and full charging performance.