
Figuring out what size cable you need for a 2000W inverter can be tricky, especially if you’re trying to keep your system safe and efficient.
The right wire gauge depends on your voltage and how far the cable runs, to prevent voltage drops and electrical issues.
By choosing the proper size, you’ll ensure reliable power and avoid shutdowns caused by undersized wiring.
This guide walks you through how to select the correct cable for your inverter setup.
Why Your 2000W Inverter Cable Size Matters More Than You Think
Using the correct cable size for your 2000W inverter is crucial because it handles approximately 167 amps at 12 volts. Thin or undersized wires increase resistance, causing voltage drops that reduce the power delivered to your inverter. For example, even a small 3% voltage drop can trigger low-voltage cutoffs, shutting down your system unexpectedly. When you select cable gauge, aim for a wire rated to handle at least 150% of your maximum current—meaning 4 AWG or thicker for a 2000W setup—to ensure lower resistance and safe operation. Properly sized cables minimize energy wasted as heat and prevent overheating, protecting your system’s components while maintaining optimal performance. A master switch rated for continuous high current is also essential for safely disconnecting the battery during maintenance or emergencies. Remember, not just the wire gauge matters; high-quality connectors and secure crimps are equally essential to avoid hotspots and additional resistance. Pairing your cables with top post battery terminals ensures a reliable, low-resistance connection that further reduces the risk of voltage drops. Ignoring these details can lead to energy losses, component stress, and potential safety hazards. For boat owners, pairing your inverter with a deep cycle battery of sufficient amp-hour capacity ensures your system can deliver sustained power without excessive voltage sag.
12V Systems: 1/0, 2/0, or 4/0 AWG-Which Cable Do You Need?
For a 2000W inverter drawing 167 amps or more from your 12V battery, selecting the correct cable gauge is essential for safety and efficiency. For very short runs under 3 feet, 1/0 AWG is suitable, but it becomes tight when your load reaches 180–200 amps. Most installations up to 6 feet perform best with 2/0 AWG, offering a practical balance that handles typical current loads without overheating. If your wiring runs extend up to 10 feet, stepping up to 4/0 AWG significantly reduces voltage drop, which helps to protect your inverter’s output and preserve your battery’s health. Always match the cable gauge to your actual DC load—don’t rely solely on the inverter’s rating. For selecting the correct battery switch, you should also consider the continuous amp rating of your system to ensure the switch can handle the inverter’s peak current demands. Use a fuse rated between 250 and 300 amps, and ensure you use the same gauge for both positive and negative cables to maintain proper balance and safety. Additionally, storing your shore power cord in a dry environment prevents corrosion on the cable lugs and ensures reliable electrical connections over time. Many boaters rely on marine battery chargers that stop automatically once batteries are fully charged, preventing overcharging and preserving battery lifespan.

Manufactured with ultra-flexible WindyNation's Cable
Manufactured with ultra-flexible WindyNation's Cable
Manufactured with ultra-flexible WindyNation's Cable
24V Systems: Why 4 AWG Is the Right 2000W Inverter Cable Size
A 4 AWG cable is the ideal choice for a 24V system providing around 2000W. Since such a system draws roughly 83 amps—about half the current of a 12V setup—you can use a smaller, more flexible cable. This gauge reduces heat buildup and minimizes voltage drop, which enhances inverter efficiency and makes battery maintenance easier. For example, when planning your installation, account for the maximum practical length of the cable run to avoid excessive voltage loss over longer distances. For short runs of 0 to 10 feet, 4 AWG cable is manageable and prevents unnecessary bulkiness or stiffness. Using copper wire is recommended for lower resistance and reliable performance. Understanding marine battery weights helps you select a battery that matches the physical support and cable routing needs of your inverter setup. Pair your 4 AWG cable with a properly rated fuse and appropriately matched terminals to ensure safe, clean connections. Keep the DC run as short and direct as possible to prevent power loss. While 4 AWG fits well for shorter distances, if your cable run exceeds 10 feet, upgrading to 2 AWG or larger helps maintain low voltage drop and efficient power transfer. This cable size strikes a good balance between cost, flexibility, and performance in a 24V system setup. Adding a battery isolator ensures that your dual batteries charge safely and prevents one from draining the other during use.

✅【Power Inverter Cable】This 4 AWG 24 inch power inverter cable is made of pure copper with tinned copper sheets on both ends, delivering excellent conductivity and compression resistance for efficient power transmission.

4 AWG Heavy-Duty Battery Cables (3ft/91cm Length) - Featuring 3/8" Pure Copper Ring Terminals for Secure Connections. Perfect for Automotive, Marine & RV Power Systems.

Include: 2pcs 4AWG-1 ft battery power cable (1x black and 1x red) power inverter cable. There is a 3/8”ring on each end.
48V Systems: 8 AWG for Your 2000W Inverter-Is It Safe?
8 AWG copper wire can handle the current from a 48V inverter at 2000W on paper, but it’s a risky choice for your setup. At 48V, your system draws about 42 amps continuously before accounting for efficiency losses. Since 8 AWG wire typically has a current rating between 40 and 55 amps, there’s very little headroom left, especially during surges or increased loads. Your battery chemistry and inverter efficiency can push the actual current higher, increasing the risk of overheating. Without proper thermal management, the wire heats up quickly in enclosed spaces. Additionally, many fuse guides recommend pairing a 48V/2000W system with a fuse around 50 amps, which pushes the limits of what 8 AWG can safely handle. While short runs in well-ventilated areas might work temporarily, relying on 8 AWG for this power level is not a safe or reliable choice. Upgrading to 6 AWG or larger wire is advised unless you can very carefully manage all variables. Applying dielectric grease to the terminal connections helps prevent corrosion and reduces the risk of sparking from compromised contacts. Such sparking often stems from loose connections or corrosion, common root causes that also apply to shore power cords when contacts are compromised. A proper MC4 connector ensures reliable, low-resistance connections that minimize heat buildup and voltage drop.

The battery cable replacement is designed to fit for automotive, solar, marine, boat, rv, car, motorcycle, etc

【Heavy Duty Safe Battery Cables】This 6 awg battery cable is made of 423 strands of 0.2mm AS copper wire. 5/16'' ring terminal at each end(already crimped). The cable is an ultra flexible pure copper cable manufactured with a tough, solvent resistant. Please refer to the photo gallery for a cable specification chart ( stranding,voltage,insulation and copper thickness, etc.)

【High Quality】A ABIGAIL battery cables are made of pure copper and tinned copper lugs with superior corrosion and oxidation resistance, which improves the oxidation resistance of copper and maintains its conductivity better.
Cable Length: How a 10-Foot Run Changes Your Wire Gauge
A 10-foot cable run significantly impacts your wire gauge choice due to voltage drop concerns. For a 2000W inverter at 12V, a one-way length of 10 feet results in a 20-foot round trip, which can cause substantial voltage loss. To keep the voltage drop under 3% at 12V, you’ll likely need to use 4/0 AWG wire. If you increase your system voltage to 24V, 1/0 AWG may be sufficient, reducing the need for extremely thick wire. Pairing this setup with a top group 27 deep cycle battery ensures adequate reserve capacity for your inverter. Using the right crimping tools with cutter ensures a secure connection on such heavy-gauge wire. You should also install a MRBF fuse near the battery to protect against short circuits.

4 AWG Battery Cables with 3/8 " lugs; battery cable length: 1 Feet/12 Inch/30.48cm

【High Quality】A ABIGAIL battery cables are made of pure copper and tinned copper lugs with superior corrosion and oxidation resistance, which improves the oxidation resistance of copper and maintains its conductivity better.
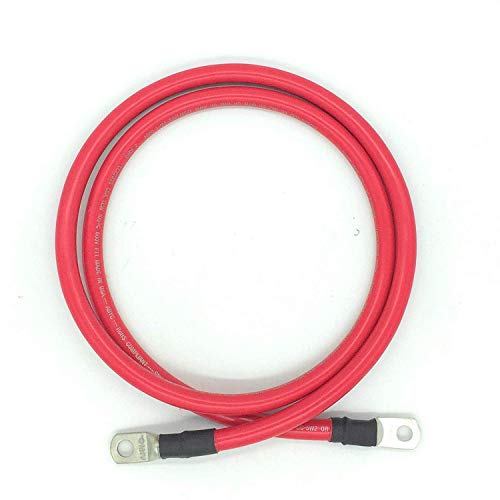
Heavy duty sealed lugs and adhesive lined heat shrink creates a completely sealed battery cable to prevent corrosion, PVC insulation is oil and fuel resistant and a better insulator than EPDM, Cable meets and exceeds USCG and ABYC specs
Voltage Drop: How to Calculate the Right Cable for Distance
To ensure minimal voltage drop for your 2000W inverter over a long cable run, you need to calculate the voltage loss based on the wire’s resistance and the total round-trip distance. Use the formula \(VD = (2 imes L imes I imes R) / 1000\), where \(L\) is the one-way length in feet, \(I\) is current in amperes, and \(R\) is resistance per 1000 feet of cable. For a 12V system, aim for a voltage drop no greater than 3 percent, which equals about 0.36V. Remember to double your one-way distance to account for both positive and negative conductors in the circuit. For accurate monitoring of your battery’s state of charge during such setups, consider using a 500A battery monitor with an integrated shunt.
Select copper wire, such as 4 AWG, for longer runs to keep resistance low. After calculating the voltage drop, compare it against your target. If your voltage drop exceeds the recommended limit, step up to a larger gauge cable to reduce resistance and improve efficiency. Additionally, verify the cable’s ampacity separately to ensure it can handle the current without overheating. Proper grounding methods and heat-resistant insulation are essential to safely manage fault currents and heat buildup during operation.
Surge Loads: Why Your 2000W Inverter Draws 230A at Peak
Your 2000W inverter can draw up to 230A at peak, especially when starting inductive loads like a fridge, pump, or power tool. Although it normally draws around 167A continuously at 12V, those brief surge currents can be two to three times higher. This spike occurs during startup when the motor or compressor initially demands much more power. Your inverter’s 4000W peak rating accounts for these surges, but your wiring must also be rated accordingly. A cable rated only for steady amps may overheat or experience voltage drops during these short peaks. Therefore, always size your cable for the maximum surge current—230A or more—and select a gauge that can handle both continuous load and sudden spikes without trouble. Proper sizing ensures your system remains safe and reliable, preventing overheating and voltage sag during those critical startup moments. To further protect the connection from moisture and corrosion in a marine environment, you should also seal each cable termination with heat shrink tubing. Upon replacing or inspecting terminals, always follow safe routing and connections to avoid accidental shorts and ensure proper current flow. Maintaining a proper charge level during winter storage is equally critical, as a deeply discharged battery can freeze and crack, while a fully charged one resists cold damage and extends its lifespan.
Fuse Sizing: How to Match Your Breaker to the Cable, Not the Inverter
When sizing a fuse for your 2000W inverter, prioritize protecting the cable, not the inverter itself. Your fuse should be rated at or below the cable’s maximum ampacity to prevent overheating and damage to the insulation. To determine the correct fuse size, start by calculating the continuous load: divide the inverter’s wattage (2000W) by your system voltage to find the current in amps. Then, multiply that number by 1.25 (125%) to account for safety margin. Compare this result with your cable’s rated ampacity and select the lower value. A larger inverter does not justify a bigger fuse if your wiring cannot handle higher current. While cable flexibility is important for routing, the fuse size must adhere to ampacity charts and installation conditions. Exceeding the cable’s rating risks nuisance trips and potential damage; upgrading the wire first is advisable. Remember, the breaker’s role is to protect the conductor—not the load or inverter. Just as an inaccurate fuse can cause battery monitor inaccuracy by failing to protect wiring from overheating, matching the fuse to the cable ensures the entire circuit operates safely and reliably.
Copper vs. Aluminum: How Cable Material Affects Gauge Selection
Copper and aluminum cables cannot be treated the same at the same gauge because aluminum requires a larger cross-sectional area to carry the same current as copper. Typically, aluminum needs about 1.6 times the cross-sectional area of copper. This often means stepping up two AWG sizes—using, for example, 2 AWG aluminum instead of 4 AWG copper—to match current capacity.
Aluminum’s higher resistance impacts voltage drop, especially over longer distances or lower system voltages. You usually need to oversize aluminum conductors beyond simple ampacity calculations to maintain acceptable voltage levels. While aluminum is lighter, copper is more compact and easier to install in space-limited setups. When choosing aluminum, ensure your lugs and terminations can accommodate the larger conductor size to avoid connection issues.

Versatile Wire Range (2/0-6 AWG): Engineered for secondary electrical distribution, the QMS-D2/0-1 accommodates stranded copper or aluminum conductors from 2/0 down to 6 AWG. This dual-rated connector is a functional solution for service entrance and equipment grounding in residential and commercial projects.

Low Voltage Wire : 12/2 gauge black and red speaker wire is ideal for low voltage applications such as 12V/24V DC circuit connections, home or car speakers, home appliances, single color LED light strip, lamps, automotive, boat etc

Product Specification: 12 AWG heavy duty metal cable 100ft with 3 solid cooper wires: 2 current-carrying wires and 1 ground wire; maximum temperature: dry 90℃/wet 75℃; voltage rating: 600V; UL listed
Your 2000W Inverter Wire Gauge Cheat Sheet (12V, 24V, 48V)
For a 12V system, you’ll need 1/0 to 2/0 AWG cable, which provides the capacity to handle the high current draw typical at this voltage. For 24V setups, about 4 AWG is sufficient, offering a balance between cable thickness and flexibility. At 48V, use 8 to 4 AWG cables; higher voltages reduce current, so smaller gauges can often handle the same power. Keep in mind that longer runs may require stepping up one or two sizes to avoid voltage drop and overheating. Always match the positive and negative cables to the same gauge to maintain safety and performance. Pair your fuse size with the conductor’s capacity—using an appropriately rated fuse protects your wiring from overload. Pay close attention to cable insulation ratings to ensure resistance to heat and chemicals, especially if routing through engine bays. High-temperature, chemically resistant jackets help prevent damage and ensure longevity. Use color coding: red for positive and black for negative. This simple step prevents dangerous reverse polarity connections. Remember, higher voltage systems lower the current needed, making cable routing easier and helping to reduce voltage drop. Keep your cable runs as short as possible from the battery to the inverter to prevent overheating and prevent energy from wasting as heat.