
Wondering what size battery isolator you need for your setup?
The key is matching it to your alternator’s maximum output, which you can find stamped on the unit or test with a clamp meter.
Choosing an isolator that can handle that peak amperage ensures reliable performance.
Keep reading to learn how to select the right size for your needs.
Battery Isolator Sizing: Why Your Alternator’s Max Output Rules It All
Your alternator’s maximum output determines the size of the battery isolator you need. The isolator’s continuous current rating must match or exceed the alternator’s peak output to handle the maximum current flow without failure. Since the alternator supplies the current, the isolator’s sizing isn’t based on your battery bank’s capacity or chemistry. Instead, it depends solely on the amps passing through it during peak operation. Selecting an isolator with an adequate rating also protects your system from voltage drops, which is a key consideration when comparing master switch options. It’s important not to confuse the isolator’s rating with the average charging current. The isolator needs to handle the maximum current, not just the typical or cruising levels. Also, pay attention to per-leg ratings in multi-bank isolators. For instance, a 75A model with 37.5A per leg means each connection is rated only half the total. Always ensure the input terminal sizing corresponds directly to the maximum source current, not just the number of batteries being managed. For the best results, choose an isolator with a rating that aligns with the top MC4 connector quality and performance standards. Proper calibration of your system’s battery monitor will also help you verify that the isolator is reading current flow correctly under peak load.

Function: The Voltage Sensitive Relay (VSR) ensures that the primary battery is always charged and ready to start the vehicle by cutting in at 13.3 volts and cutting out at 12.8 volts. When your engine is turned on and the starting battery is fully charged, the isolation will start charging the second (auxiliary) battery at the same time. Enables you to charge two batteries from one alternator at the same time.

Smart Voltage Sensitive Relay can automatically disconnect or connect the auxiliary battery according to the voltage of the main battery.

【Function】——Voltage Sensitive Relay(VSR) cuts in at 13.3v and cuts out at 12.8v to ensure your main battery is always charged and ready to run your vehicle. The dual battery isolator can display the voltage, you can check the battery voltage in time
How to Find Your Alternator’s Maximum Amp Rating for Sizing
To find your alternator’s maximum amp rating, start by checking the alternator housing for a stamped rating like “12V 100A.” If it’s missing, consult your vehicle’s owner manual or look up the original equipment specifications using the Vehicle Identification Number (VIN). Factory service manuals also confirm the exact rating for your engine and trim. Keep in mind that not all same-year models share the same alternator rating, so verify your specific vehicle’s capacity. To be precise, test the output with a DC clamp meter on the alternator’s B+ cable. With the engine running at 1,500-2,500 RPM, apply a load using accessories or a carbon-pile tester. Compare your measured amps to the manufacturer’s specified rating, allowing for a 10% variance. Remember that proper voltage regulation affects these measurements, and maintaining your alternator ensures accurate readings. Use the highest verified amperage as your reference for sizing your isolator. Additionally, perform a voltage drop test across the alternator’s supply circuit to ensure bad connections are not impairing the output reading. For reliable cable connections during this process, consider using a quality crimping tool to secure your test leads. When selecting a compatible 12V power inverter, ensure its continuous rating does not exceed your alternator’s verified amperage to avoid overloading the charging system. For deep-cycle house batteries, an AGM deep cycle battery offers superior safety and performance by preventing acid spills and handling deep discharges better than flooded batteries.

Catch Battery Problems Early: Featured in two videos by Project Farm, a popular YouTube channel with millions of subscribers, the ANCEL BA101 helps you quickly spot battery issues before they leave you stranded. It provides easy-to-understand readings for State of Health (SOH), State of Charge (SOC), voltage, current, CCA, plus cranking and charging system tests, so you can better understand your battery and help avoid unexpected breakdowns

2-in-1 Voltage & Current Monitoring – Displays real-time DC voltage and amperage in one compact digital gauge. Max 10 amps.
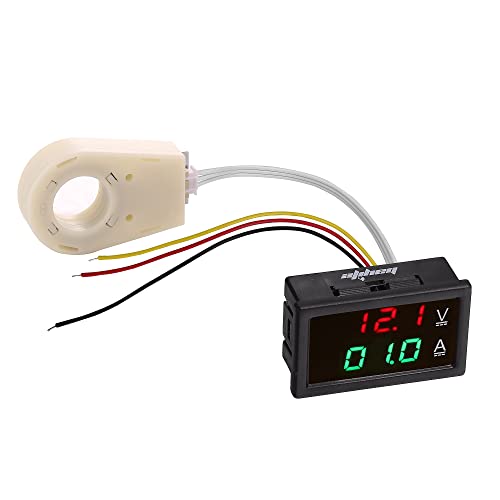
Dual display: Display Voltage and (+ -) Current at the same time; Power supply: DC 5~100V; Voltage test range: 0~300V; Current test range: ±0~100A
The Simple Rule: Match Your Isolator to the Alternator’s Peak Amps
Match the isolator’s rating to the alternator’s peak output in amps. For example, a 60A alternator requires a 70A isolator, while an 80A alternator needs a 95A or 100A model. This ensures the isolator can handle the maximum charging current without overheating. The size of your battery doesn’t influence the isolator rating; only the alternator’s peak amps do. Using an isolator rated below the alternator’s peak can lead to heat buildup, reduced lifespan, and unreliable charging. For similar safety considerations in boating or racing applications, a kill switch with lanyard provides an additional layer of protection by quickly cutting power in an emergency. Some standalone solar chargers also rely on direct alternator-like current, so choosing a charger without battery storage can simplify the system design. For lithium batteries, using a lithium-compatible battery charger ensures proper charging profiles and safety.
Always select an isolator at or slightly above the alternator’s peak amperage. For a 145A alternator, choose an isolator rated for 150A or higher to prevent damage and maintain optimal performance. Ranging from 70A to 240A, isolators suitable for 12V systems typically fall between 100A and 140A. Matching the isolator’s rating to the alternator’s peak output is key to avoiding heat issues and ensuring consistent, efficient charging.

Heavy Duty: ABS plastic housing, durable made for safety use, rear cover insulates terminals against any short of circuits, equipped with 4 sets of bolts.

【Function】——Smart battery isolator cuts in at 13.3 volts and cuts out at 12.8 volts to ensure your primary battery is always charged and ready to run your vehicle. Car battery isolator allows parallel charging of both batteries

Function: The Voltage Sensitive Relay (VSR) ensures that the primary battery is always charged and ready to start the vehicle by cutting in at 13.3 volts and cutting out at 12.8 volts. When your engine is turned on and the starting battery is fully charged, the isolation will start charging the second (auxiliary) battery at the same time. Enables you to charge two batteries from one alternator at the same time.
What ‘Per Leg’ Ratings Actually Mean for Your Multi-Battery Setup
A “70 amp per leg” rating on a battery isolator indicates that each output path or branch can handle a maximum current of 70 amps. This means that the current flowing to each individual battery, such as your starter or auxiliary battery, should not exceed this limit. It does not represent the combined total capacity of the entire device. Instead, it ensures that each separate branch is protected and can operate safely without overloading. Choosing the right isolator also involves ensuring its internal components are not damaged by excessive heat, much like selecting a heat gun with proper airflow to avoid overheating shrink tubing. For boat owners, the longevity of your isolator depends on similar factors as shore power cords, such as avoiding constant high loads and protecting connections from corrosion. Using the best battery straps for secure wiring connections can help prevent loose terminals that might increase resistance and lead to overload.
Understanding this rating is essential because if one branch draws more than its rated 70 amps, it creates a bottleneck, which can lead to overheating or potential damage. When wiring your multi-battery setup, always verify that the load expected on each branch stays within the per-leg limit. Consulting wiring diagrams and load calculations helps ensure each branch is configured properly. Following these guidelines guarantees your system runs efficiently and safely, preventing issues caused by exceeding individual branch ratings.
When Wiring, Distance, or Heat Force You to Oversize the Isolator
When wiring, distance, or heat force you to oversize the isolator, it’s essential to choose a unit larger than the load actually demands. Long cable runs increase voltage drop, which turns energy into heat that damages cable insulation over time. If your isolator is far from the batteries, resistance in the wire adds up, and you’ll need a larger capacity unit—typically 1.5 times the continuous load—to keep voltage loss below 2.5%. In hot engine bays, high ambient temperatures significantly reduce the cable’s current-carrying capacity, meaning a 100A load at 50°C might require a 150A isolator to maintain safe margins. Bundled cables trap heat, further decreasing performance and risking insulation failure. Additionally, a shore power cord that sparks often points to similar heat-related connection issues that can degrade wiring over time. Always account for your wiring path and environment when sizing the isolator, as oversizing now ensures you avoid melted insulation and voltage drops that can leave accessories underpowered. For best performance, pair your isolator with a charge controller designed for lead acid batteries to optimize charging and prevent damage. However, a poorly matched isolator can introduce a small parasitic drain, so selecting the right size also helps prevent battery isolator drain.

𝗨𝗻𝗶𝘃𝗲𝗿𝘀𝗮𝗹 𝟭𝟮𝗩 𝗖𝗼𝗺𝗽𝗮𝘁𝗶𝗯𝗶𝗹𝗶𝘁𝘆: Works with any type of vehicle alternator or charging system.

𝗨𝗻𝗶𝘃𝗲𝗿𝘀𝗮𝗹 𝟭𝟮𝗩 𝗖𝗼𝗺𝗽𝗮𝘁𝗶𝗯𝗶𝗹𝗶𝘁𝘆: Works with any type of vehicle alternator or charging system.

500 Amp Battery Isolator
Common Battery Isolator Sizes: Which One Fits Your Alternator?
Choose a battery isolator with a continuous amperage rating that matches or slightly exceeds your alternator’s maximum output. For example, if you have a 70A alternator, opt for a 70A or 95A isolator. An 80A alternator pairs well with a 95A or 100A model. For a 95A alternator, select a 100A or 120A isolator to ensure it can handle peak output without overheating. A 130A alternator should be matched with a 130A or 165A isolator. Common sizes available include 70A, 95A, 120A, 130A, and 240A from brands like ProMariner and Newmar. Always choose a size that is at or above your alternator’s maximum amperage, especially if your alternator ratings fall between two standard sizes, to prevent charging inefficiency and extend battery lifespan. For dual battery systems, pairing a properly sized isolator with top deep cycle batteries ensures reliable performance and long-term capacity. Verify the isolator’s continuous amp rating before purchasing to ensure it can handle your alternator’s peak output safely. For safe installation, ensure your wiring gauge and connections follow the correct routing guidelines used in boat switch panels.

【500 AMP BATTERY ISOLATOR】The 500 Amp Battery Isolator is designed to isolate a second battery or applications where multiple batteries need to be isolated, making it ideal for audio, navigation, winches, generators, etc., without dropping the voltage of the second battery as traditional isolators do while preventing the main battery from discharging
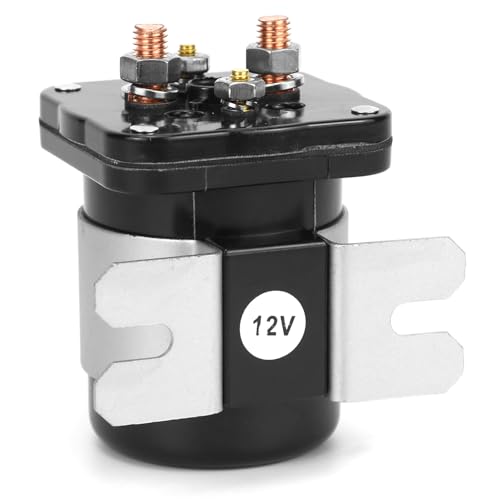
High Power Handling: Capable of managing 500 amps of continuous power at 12V and surges to 700 amps, it offers reliable performance.

【Function】——Voltage Sensitive Relay(VSR) cuts in at 13.3v and cuts out at 12.8v to ensure your main battery is always charged and ready to run your vehicle. The dual battery isolator can display the voltage, you can check the battery voltage in time
What If Your Alternator Has No Stamped Rating?
If your alternator has no stamped rating, determine its maximum output by consulting the vehicle service manual or inspecting the alternator housing for a label or part number you can cross-reference. If those options aren’t available, you will need to perform alternator testing with a clamp meter under load to measure the actual charging current. Use this measurement as your reference point for the maximum current capacity. For lithium marine batteries, ensure the measured current does not exceed the battery’s recommended charging limits to prevent system damage. When selecting an isolator, size it to handle the alternator’s highest plausible output, not just the typical load. Oversizing the isolator is safer because it needs to accommodate surges and heat. Keep in mind that voltage regulation and the battery’s state of charge influence the available current, so it’s wise to include a conservative margin. Also, ensure that your cables and fuses are rated to support this current; undersized wiring can become the limiting factor and cause system issues. For reliability, consider using heat shrink tubing to insulate and protect all wire connections from moisture and vibration. You can also follow the same safe battery connection steps used for trolling motors to ensure secure and durable wiring.