
Ready to connect two batteries to get more power or a higher voltage? Wiring batteries in series is a simple way to double your system voltage from 12V to 24V while keeping the same capacity.
Make sure to use matching batteries and follow proper safety steps for a reliable setup.
Below, you’ll find all the details to do it safely and correctly.
What Is Wiring Batteries in Series (and Why Use It)
When wiring batteries in series, you connect the positive terminal of one battery to the negative terminal of the next, forming a chain that increases the total voltage while maintaining the same capacity. This arrangement creates a single circuit with only the free positive and negative terminals available for your load or charger. Series wiring is useful when your system requires a higher voltage, such as 24-volt or 48-volt setups for solar power, RVs, or golf carts. It’s a common solution when a single battery cannot supply the necessary voltage. Keep in mind that the overall capacity depends on the matched batteries operating together as one pack. Always double-check polarity and connections to prevent short circuits and ensure safety. Series wiring provides a straightforward way to achieve higher-voltage direct current power. For marine applications, choosing a battery with a deep-cycle design is often critical to withstand repeated discharging and recharging without damage. For optimal connections, consider using best battery terminals to ensure reliable performance and secure contact between batteries. A battery’s cold cranking amps rating helps determine its ability to start engines in low temperatures, which is especially relevant when configuring a multi-battery series system for marine use.

[Robust and Durable] Our quick-disconnect car battery terminal connector is made of tinned copper, which not only has good conductivity and corrosion resistance, but also can reduce voltage distortion and transmission loss. Positive and negative battery terminal material: pure copper+plastic.

⚡ Battery Connector Wing Nuts: Battery terminals clamps with color-coded positive & negative wing nuts, which not only can help you identify positive and negative fast, also can help you quick and easy wire replacement without using a wrench. Stable wiring, not easy to drop.
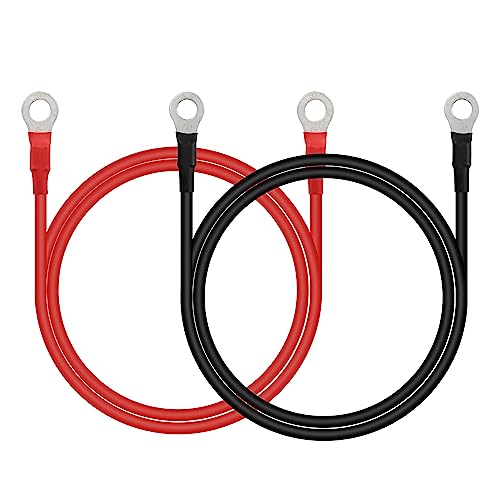
【Battery Inverter Cable Set】 A set of battery positive (red) and negative (black) cables for connecting batteries in parallel or in series
How Wiring in Series Changes Voltage and Amp-Hours
Wiring batteries in series increases your system’s voltage while keeping the amp-hour capacity the same. To do this, connect the positive terminal of one battery to the negative terminal of the other, ensuring correct polarity to prevent shorts. When calculating voltage, simply add each battery’s voltage: two 12V batteries in series provide 24V total. However, the amp-hour rating remains equal to that of a single battery, so two 100Ah batteries still offer only 100Ah of capacity. Current flows through all batteries in the string at the same rate, so amp-hours do not increase. While amp-hours stay constant, the total stored energy rises, which can be measured in watt-hours. For example, two 12V 100Ah batteries create a 24V 100Ah bank, doubling the energy storage from 1,200Wh to 2,400Wh. Using watt-hours provides a more accurate comparison of energy capacity than amp-hours alone. For secure connections between batteries, heat shrink tubing is also commonly used to insulate and protect exposed wiring terminals from shorts. High-quality heat shrink tubing ensures reliable insulation and prevents short circuits in series wiring setups. When choosing terminal hardware for these connections, wing nut terminals offer a secure yet tool-free option for tightening battery cables.
Why Battery Matching Matters When Wiring in Series
Matching batteries when wiring in series is crucial because mismatched cells can cause significant issues. Differences in voltage, capacity, or internal resistance create imbalance within the pack, leading to uneven charging and discharging. This imbalance results in one battery working harder, heating up more, and degrading faster, which shortens overall lifespan and impacts performance.
A series configuration relies on each battery sharing the load equally. If one cell has a lower capacity or is older, it becomes the weakest link, limiting the total available energy. This forces you to stop using the pack sooner or risk over-discharging the weaker cell, which accelerates wear and damages the battery. Age differences also matter; older batteries may no longer accept or release charge as efficiently, exacerbating imbalance.
To ensure reliable and predictable operation, you should use batteries that are identical in voltage, amp-hour rating, and age or condition. Matching batteries helps maintain equal depth of discharge and keeps voltage more stable under load. Failing to match them can lead to uneven wear, reduced effectiveness, and potential safety hazards.

Compatible for Xbox Controllers Original: Specially designed for Xbox Series X, X box Series S, X box One, X box One X, X box One S, X box One Elite controller. The Ni-MH Rechargeable battery pack comes with 4 battery covers, 2 for Xbox one and 2 for Xbox Series X/S. The charger and battery kit offers a high capacity and fast charging solution (Warm Tips: Not Fit for Third-Party Controllers, NOT Compatible with Xbox 360)

【Compatible with】It is compatible with Apple Watch Series 5 40mm. Not for 44mm. Please double-identify and check your phone model matches before purchasing the battery.

【SAY GOODBYE TO AA BATTERIES】 Stop wasting money on endless disposable AA batteries. This premium NiMH Xbox controller battery pack is designed to pay for itself in just 2-3 weeks. Each pack supports over 1000+ charging cycles, providing a cost-effective, eco-friendly, and reliable alternative to standard disposable batteries. Keep your controllers powered up and your gaming budget intact.
Tools and Materials for a Clean Series Connection
To ensure a clean and reliable series connection, start by gathering the right tools and materials. Use heavy-duty stranded battery cables in the correct gauge—thick and short cables are best, as they reduce voltage drop and make cable routing easier. Choose red and black insulation to clearly indicate polarity, preventing wiring mistakes. Crimp copper lugs that match both the cable size and terminal studs, using a proper crimper to ensure a solid, secure connection. Seal each crimp with adhesive-lined heat shrink tubing; this prevents corrosion and protects your connections over time. Complete your kit with a wire stripper, a ratchet for tightening terminal hardware, cable ties for organized routing, and a digital multimeter for voltage checks. For optimal performance, choose a top wire stripper that offers quality and precision. Safety glasses and insulated gloves are essential for protection during the process. The best plastic battery boxes offer durable enclosures to house your series-connected batteries safely. Using a high-quality lithium charger ensures proper charging of the series bank without overvoltage or imbalance. With these tools and materials, you’ll build a robust, tidy series connection that performs reliably.
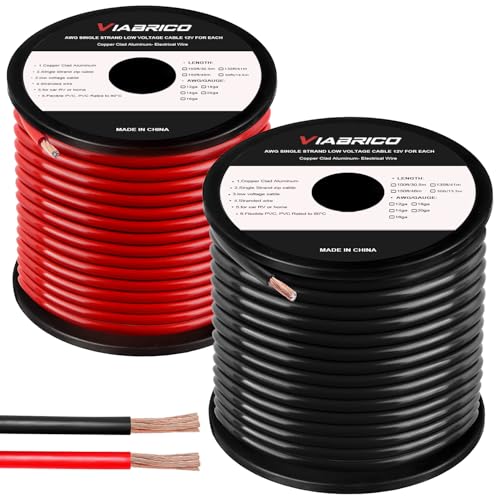
COPPER CLAD ALUMINUM (CCA) - Our primary cable CCA wire is the most economical option for choosing power or ground wire and is a great conductor of power. Copper coated aluminum gives you an economic power cable with excellent power transfer. Systems that require more power should use ofc cable wiring.
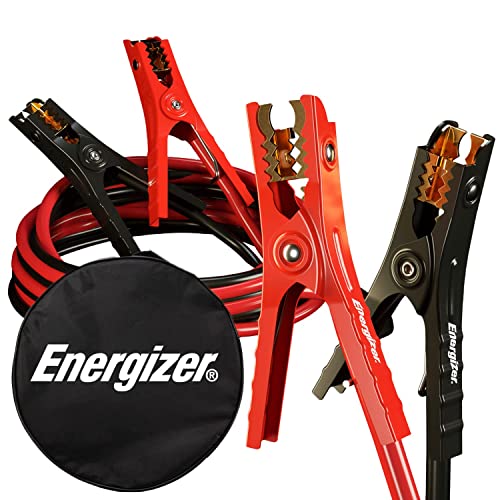
ENERGIZER 16 FEET JUMPER CABLES - 6 Gauge, 16 FT booster battery jumper cables for jump starting a dead or weak battery. Ideal for trucks, SUVs, full-size cars, mid-size cars and small/compact cars

PRODUCT SPECIFICATION -- 5FT Red + 5FT Black 8 AWG Battery Cable. 186 Strands of 0.24mm Copper. Rated voltage: 600V. Rated working temperature from -40°F to +221°F(-40°C to +105°C), resistant to most solvents and fire resistant.
Step-by-Step: How to Wire Two Batteries in Series
To wire two batteries in series, you need a jumper cable or wire, a wrench for tightening terminals, and a voltmeter to verify the connection. First, check the battery safety: identify and confirm the polarity of each battery, ensuring both are of the same voltage and capacity. Position the batteries side by side with accessible terminals and verify they are in good condition. This process, similar to correct routing and connections in a boat switch panel, ensures reliable power distribution. Selecting high-quality heat shrink tubing is essential to insulate exposed wire connections and prevent short circuits. Applying a corrosion prevention spray to the terminals can further protect the connection over time.
Begin the wiring process by connecting the negative terminal of the first battery to the positive terminal of the second battery using the jumper cable. Make sure the connection is tight and secure. This positive-to-negative link creates the series connection, which increases the overall voltage. Refer to wiring diagrams if needed to visualize the process.
The remaining free terminals—the positive terminal on one end and the negative terminal on the other—serve as the output. Connect your load to these outer terminals. Finally, use a voltmeter to measure across the outer terminals and ensure the total voltage matches the sum of both batteries’ voltages, confirming the series wiring is correct.
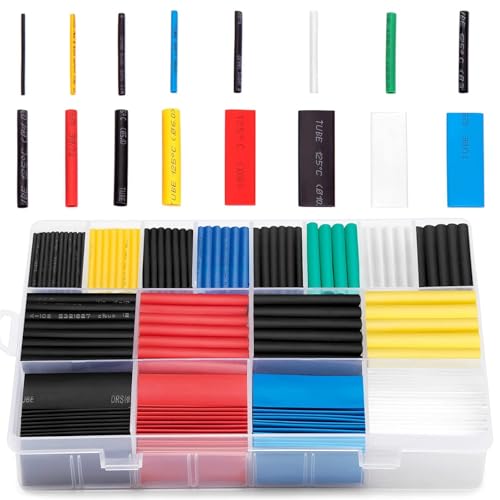
BIG COLLECTION – Totally 580pcs,11 specifications: 1/24"(80pcs),1/16"(80pcs),1/12"(100pcs),3/64"(30pcs),1/8"(60pcs),9/64"(30pcs),5/32"(70pcs),1/5"(30pcs),15/64"(20pcs),5/16"(20pcs),25/64"(60pcs).

3:1 SHRINK RATIO & FAST CONTRACTON SPEED: Shrinks to 1/3 of its original diameter and seals extremely tightly, solving the problem of many 2:1 shrink tubes that don't shrink enough and therefore don't seal tightly enough, Shrink temperature: 80 to 125°C, Provides a professional connection within seconds.

Controlled Shrink Fit: The 3:1 tubing reduces to one-third of its supplied diameter when heated; select a size that fits over the connection before applying heat.
Common Mistakes When Wiring in Series
Wiring mistakes are common pitfalls that can cause serious damage or safety hazards. One of the biggest errors is mixing batteries of different ages, capacities, or chemistries. This leads to uneven charging and can cause batteries to fail prematurely. Always ensure that batteries in a series are identical to promote balanced operation.
Ignoring the importance of matching the state of charge is another mistake. Connecting a fully charged battery to one that is depleted causes large equalization currents. These excessive currents can trip battery management systems or damage the batteries. Always match the starting voltages before connecting batteries in series.
Using cables that are too small for the current load increases heat buildup and fire risk. Make sure to select cables with adequate cross-sectional area rated for the intended current. Additionally, unequal cable lengths create uneven current paths, which can lead to overheating and uneven charging. Use identical, properly rated conductors with equal lengths for balanced performance. For securing cable connections to battery terminals, heat shrink tubing provides insulation and strain relief.
Neglecting a main disconnect or individual fuses compromises safety. Without these safety components, faults can cause high current flows that damage equipment or cause fires. Always include appropriate fuses or circuit breakers in your series wiring setup. For additional protection, consider installing a reliable master switch to allow for quick disconnection of the entire battery system in emergencies. When powering sensitive electronics from the series bank, it is critical to use a pure sine wave inverter to prevent damage from dirty power.
Finally, double-check polarity before finalizing connections. Reversing battery terminals can blow fuses or damage sensitive electronics. Tighten all connections securely to minimize resistance, which can cause heat and corrosion over time. Proper wiring and adherence to safety standards are essential to protect your batteries and equipment.
How to Test Your Series Battery Bank
To test your series battery bank, start by measuring each battery’s resting voltage with a multimeter. First, disconnect the batteries from each other to obtain accurate individual readings. Allow the batteries to rest for at least 30 minutes; for the most reliable results, wait between 4 to 12 hours to ensure voltage stabilization. This step helps identify imbalances or weak units, which are critical for maintenance. For a quick reference, battery switch reviews can help you select a reliable disconnect method that simplifies this testing process.
After recording the individual voltages, perform a load test on the entire bank. Apply a known load, such as a 250A draw for a 500 CCA battery, and hold this load for 15 to 30 seconds. Observe how much the voltage drops; a healthy battery will maintain a more stable voltage, while a weak one will sag significantly. This method quickly highlights potential issues before relying on the bank.
For flooded lead-acid batteries, check each cell’s specific gravity using a hydrometer. Differences over 0.05 between cells indicate imbalance or deterioration. Combining the resting voltage readings with the hydrometer results offers a comprehensive view of each battery’s health, guiding you on which units may need replacement.
Series vs. Parallel: When to Use Each
Use series wiring when your system requires a higher voltage, such as 24V or 48V for inverters, electric vehicles, or large solar setups. Connecting batteries in series adds their voltages together while keeping the amp-hour capacity the same. This reduces the current needed for long cable runs, helping to minimize voltage drop and improve efficiency. Series wiring also simplifies maintenance and wiring safety because it allows you to use thinner cables, which are easier to handle and install. For long-term storage or maintenance, a trickle charger can help keep each battery in good condition.
Choose parallel wiring when you need more runtime at the same voltage, such as in 12V RVs, boats, or backup power systems. Connecting batteries in parallel increases the total capacity by summing their amp-hours, providing longer usage time. It also adds redundancy: if one battery fails, the others keep working without dropping the system’s voltage. Always start by checking your system’s voltage requirement. Add capacity in parallel only if additional runtime is needed for safe and efficient operation.
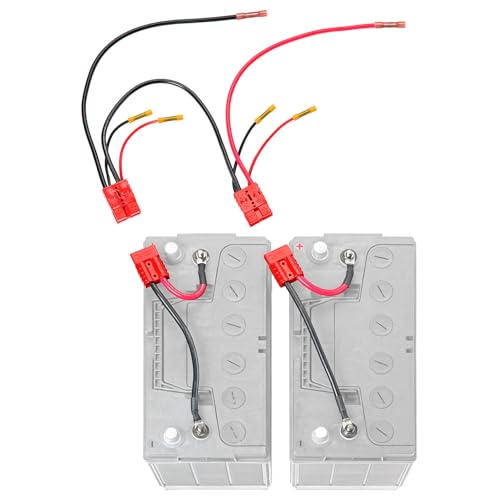
WIRES TWO 12V BATTERIES INTO 24V: The bridge connector is pre-built for a series connection, so the batteries land at 24 volts. No tracing a diagram in a dark battery compartment, and no wrong post to land the jumper on. Snap it together and your 24V trolling motor is wired.
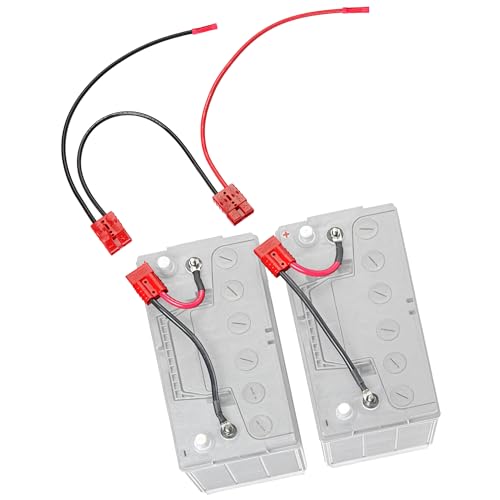
THE STRAIGHT 24V TROLLING MOTOR WIRING KIT: Two 12V batteries, one pre-built series bridge, one plug to the motor. No onboard charging leads. Built for anglers who charge off the boat or with a portable charger.

【Materials】The battary inverter cable is made of Copper Wires with Battery Terminals Connectors which can offer maximum power transfer and corrosion protection.