
Wondering how to check if your battery’s cranking amps are still strong enough to start your engine? The simplest way is to measure the voltage drop during a crank—anything above 9.6 volts generally means your battery is good.
For a more accurate reading, a digital load tester can give you a clear picture of your battery’s capacity.
Below, you’ll find all the easy steps to perform these tests and keep your vehicle reliable.
Prep Your Battery and Car for an Accurate Cranking Amp Test
To ensure an accurate cranking-amp reading, fully charge your battery first. A partially charged battery can give a falsely low result, so aim for a resting voltage of 12.6 volts or higher before testing. Turn off all car accessories like the radio and headlights to prevent parasitic loads from affecting the measurement. Next, run the headlights for 1 to 2 minutes to remove surface charge, which can cause a deceptively high reading. Inspect the terminals for corrosion or debris and clean them thoroughly to ensure a solid connection with your tester. Always wear gloves and safety glasses, and conduct the test in a well-ventilated area. Proper preparation helps avoid false readings and keeps your equipment protected. Additionally, disconnect the battery from the vehicle to prevent interference from the car’s electrical system during testing. For secure connections during reassembly, consider using quality crimping tools to attach new cable lugs to the battery terminals. Choosing terminals made from high-conductivity brass can further improve electrical flow and overall testing reliability. To keep cables organized and fixed firmly after reassembly, use screw hole cable ties for secure attachment near the battery tray.
Method 1: Using a Digital Load Tester (Most Reliable)
A digital load tester is the most reliable method for checking your battery’s health. To get accurate results, start with a fully charged battery, clean terminals, and ensure surface charge is removed. Connect the red clamp to the positive terminal and the black clamp to the negative terminal, making sure there is no corrosion that might interfere with the connection. Find the battery’s exact Cold Cranking Amps (CCA) rating on the label and input this information into the tester. Select the correct battery type—flooded, AGM, or gel—so the device applies the proper testing parameters. When ready, initiate the test. The load tester applies a controlled load instantaneously and displays the available CCA and overall battery health. The AUTOOL BT460, for example, guarantees 99.9% accuracy in these measurements due to its high-grade copper clamps.
A healthy battery will typically show a CCA reading close to its rated value, indicating it can perform effectively under load. A weak or failing battery will produce a significantly lower CCA reading, signaling potential replacement. Many digital load testers also allow you to test the alternator, verifying that your vehicle’s charging system maintains adequate voltage when the battery is under load. Be careful to enter the correct CCA rating—using incorrect data can result in misleading outcomes. This method is quick, precise, and suitable for a wide range of battery types and CCA sizes, making it your go-to option for reliable battery diagnostics. For those seeking a similar level of protection during charging, overcharge protection features in solar chargers help prevent battery damage from excessive voltage. For a consistent maintenance charge, a trickle charger for lithium battery helps preserve long-term battery health between tests. Ensuring clean and corrosion-free terminals is critical, as using top WD-40 choices for cleaning can effectively remove buildup and improve electrical contact.

Catch Battery Problems Early: Featured in two videos by Project Farm, a popular YouTube channel with millions of subscribers, the ANCEL BA101 helps you quickly spot battery issues before they leave you stranded. It provides easy-to-understand readings for State of Health (SOH), State of Charge (SOC), voltage, current, CCA, plus cranking and charging system tests, so you can better understand your battery and help avoid unexpected breakdowns

[Car Battery Tester] You can easily test and inspect your 12V lead-acid battery with this TOPDON car battery tester. The SOH (State of Health), SOC (State of Charge), Voltage, Current, Rating, and numerous other understandable analytical data are provided by this battery tester. It is compatible with 100-2000CCA regular flooded, AGM flat plate/spiral, EFB, and GEL for their optimum performance.

【Reliable Automotive Car Battery Tester】 KW208 is the most cost-effective battery load tester compared to other brands, it has all the functions you need and the lowest cost that you can afford. KW208 can test all 12V batteries(100-2000CCA) including regular flooded, AGM flat plate, AGM spiral or gel batteries. Provide overall analysis of batteries’ condition and help you know their status in advance before it dies. KW208 battery analyzer supports cranking and charging system tests also alternator and starter test. Conveniently store this car battery tester for batteries in your glove box or garage, ready for use whenever needed.
Method 2: The Multimeter Cranking Voltage Test
To perform the multimeter cranking voltage test, set your digital multimeter to DC volts on the 20V range. Connect the red lead to the positive terminal and the black lead to the negative terminal, making sure the contacts are solid. Clean any corrosion from the battery terminals first, as dirt and corrosion can create false low readings. Have your helper crank the engine for 3 to 5 seconds while you observe the lowest voltage dip on the meter. This voltage drop indicates how well the lead plates perform under load. A reading near 9.6 volts or higher usually shows the battery has enough cranking power. If your multimeter has a Min/Max function, avoid using it; simply watch for the lowest voltage during the test, and it will be captured automatically. Keep in mind that temperature and accessory loads can affect the readings, so it’s best to perform the test with everything turned off to ensure accuracy. For accurate results, perform at least three cranks each of ≤5 seconds with a 5-minute interval between them. For a battery bank using Li-Ion chemistry, a solar charge controller is required to prevent overcharging and ensure safe operation. Ensuring your battery is housed in a quality battery box with terminals helps maintain clean connections and accurate test results.
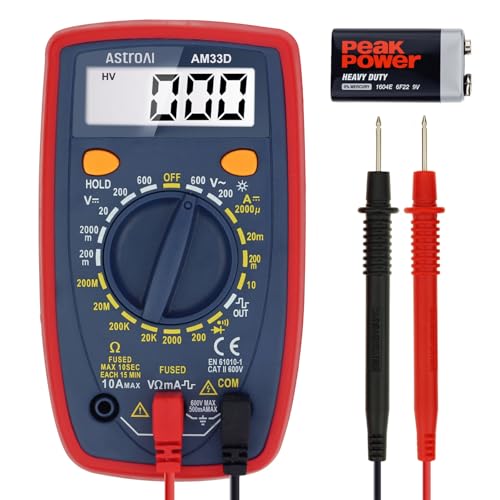
Additional Tips - The following incorrect operations may cause the multimeter not to show results: Firstly, the plugs of test leads are not fully inserted or not inserted into the correct sockets. Secondly, the manual rotary switch is not placed in the correct position. In addition, this meter can not test all AC Current and below 100mV AC Voltage. Please check the user manual carefully before measurement.

Accurately Test Full Features: Accurately measures AC/DC voltage, DC current, resistance, continuity test, diode and batteries.
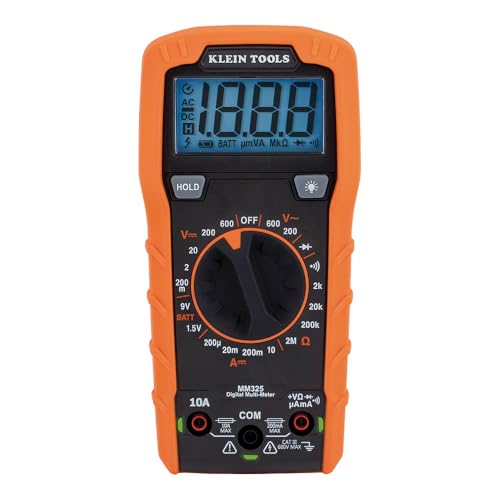
VERSATILE FUNCTIONALITY: Measures AC/DC voltage up to 600V, 10A DC current, 2MΩ resistance; additional features include continuity, diode test and battery test
Pass/Fail Voltage Targets: What 9.6 Volts Really Means
When loading-test a 12V battery, a voltage of 9.6 volts or higher at 70°F (21°C) indicates the battery is passing. This threshold represents the minimum acceptable voltage during a 15-second load test, and it reflects your battery’s voltage stability under stress. If your reading is at or above 9.6V, the battery likely has sufficient capacity for regular use. If it drops below that, the battery is probably weak or discharged. Temperature plays a key role in these targets because colder weather slows battery chemistry. For example, at 60°F, the pass mark drops slightly to 9.5V; at 50°F, it decreases further to 9.4V. Always ensure you apply the correct load during testing, typically half the CCA (cold cranking amps) rating, and test on a surface-charge-free battery for the most accurate result. Keep in mind, exactly 9.6V is on the borderline—if your reading falls below it, you should recharge and retest before considering the battery as failed. Just as a loose connection at the shore power pedestal can cause sparking under load, a weak battery connection can produce misleading voltage drops during testing. A faulty battery isolator can also create a similar parasitic drain, reducing your battery’s available cranking power over time. For trolling motor applications, a deep-cycle battery is better suited than a starting battery because it can handle sustained discharge without damage.
How to Read Your Results and Spot a Failing Battery
Once your battery tests at 9.6 volts or higher, compare the tested cold cranking amps (CCA) to the rating label. If the CCA is roughly 15 percent or more below the rated value, it indicates reduced starting power and possible internal damage. Watch for symptoms like slow cranking or dimming lights during startup, which confirm a weakened battery. Low CCA shortens battery life because sulfation or plate damage have already occurred. Even if the resting voltage appears normal, poor cranking performance signals the battery cannot supply sufficient power. For boats, installing a shunt monitor helps track actual battery capacity and performance more accurately than a simple voltage readout. Visible signs such as swelling or age further suggest it’s time for replacement. Recharge the battery and retest; if the CCA remains low, replacing the battery is advisable. Boat owners should consider that Group 31 batteries typically deliver higher cranking power and longer lifespan than Group 24 options, making them better suited for larger engines.

[Dual Purpose]: The WEIZE BCI Group 31M is a dual purpose deep cycle sealed AGM marine and RV battery. It features an outstanding starting power and deep cycling capability for long-lasting power supply. Terminal: Left : Positive (+)-Red, Right: Negative (-)-Black.
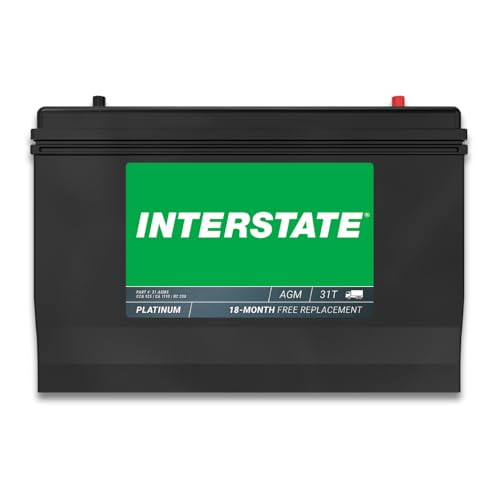
EXTREME DEEP-CYCLE POWER: This 2-in-1 pure lead AGM battery delivers high-cranking, extreme deep cycle power. It's designed to provide reliable force over an extended period to power your boat's motor & all of its accessories (appliances, trolling motor, audio systems, depth finders, fish locators, windlass). Not all marine batteries are the same - but this one exceeds the rest. Built with thick plates to allow the battery to continuously discharge power so you can recharge it many times over without decreasing its lifespan

A rugged battery tray for group 31 batteries, including marine, RV, camper, and trailer batteries.
Three Common Mistakes That Skew Your CCA Readings
To get accurate cold cranking amps (CCA) readings, you must avoid common pitfalls that can distort your results. First, never test a battery immediately after charging. A surface charge can mask weak cells, giving an artificially high reading. You should allow the battery to rest for at least 15 minutes before testing. Additionally, temperature significantly affects measurements: cold batteries tend to test weaker, while warm ones can conceal internal weaknesses. Always measure the battery’s temperature first and account for it during testing. Understanding the fundamental difference between starting and deep cycle marine batteries helps you choose the correct test standard for your boat’s power demands. Selecting the best solder for battery terminals ensures low-resistance connections that improve overall testing accuracy. For the most reliable results, using a dedicated battery tester can automate these temperature and type compensations.
Second, ensure you input correct battery information into your testing device. Mismatched data, such as testing an AGM (Absorbent Glass Mat) battery as a flooded type, leads to inaccurate comparisons. Always verify the exact CCA rating and standard printed on the battery label and select the corresponding settings on your tester to match.
Third, establish solid electrical contact between the tester and the battery. Loose or corroded terminals add resistance, skewing results. Use proper lead adapters designed for side-terminal or top-stud batteries, rather than steel bolts or makeshift connectors. Clean all terminal surfaces and tighten connections securely. Lastly, avoid relying on a single quick test. Conductance testing methods tend to be more consistent than simple load testing; always double-check your results under consistent conditions to prevent false conclusions.

MULTI PURPOSE USE- can be used to test different type of household batteries like AA, AAA, C, D, 1.5V,9V and 1.5V button type
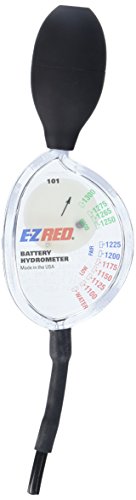
BATTERY HYDROMETER: This battery tester is made to stand up to tough treatment in service stations & garages. It's designed so that both customer & technician can see the state of the battery acid..Fit Type: Universal

【Package Content】 - 2 Pack battery tester, Opp bag. Weight light and easy to carry.
Why Cold Weather Reveals Your Battery’s True Strength
Cold weather exposes your battery’s true capacity because low temperatures slow down the internal chemical reactions that generate power. At 0°F, your battery typically loses around 40 to 50 percent of its available capacity. This reduction means your engine requires more energy to start due to the thickening of engine oil in cold conditions. Weak batteries that seem capable in warm weather can fail dramatically during winter, revealing their true limitations. For example, ensuring proper solar panel wiring to a marine battery can help maintain a stronger charge, reducing the risk of cold-weather failure. Using reliable crimping tools for secure battery cable connections also prevents voltage drops that weaken starting power. To confirm your battery’s output is sufficient, you can use a multimeter on the marine battery’s terminals to verify voltage under load, similar to testing a marine circuit breaker’s continuity.
Proper battery maintenance becomes crucial as cold weather acts as an unbiased stress test. A battery that is already discharged can freeze when the temperature drops near 14°F, which can cause the plates to crack and the case to rupture. Since winter conditions challenge the battery’s ability to deliver power, it’s a clear indicator of whether your battery is strong enough to get you through the cold months. Don’t wait until a freezing morning to discover your battery’s true strength.

Test rechargeable and alkaline batteries
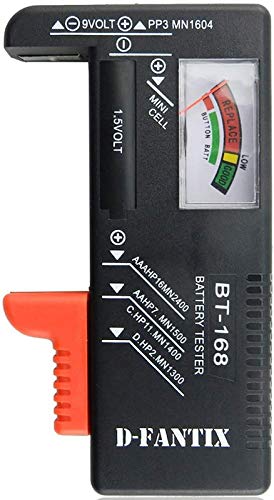
SMALL & PRACTICAL - Simple but effective battery tester checker for home (BT-168) , compact size and lightweight,easy to carry

✅【Car Battery Tester】 BR502 can test all 6V/12V/24V 100-2000CCA batteries including regular flooded, AGM flat plate, AGM spiral, or gel batteries, compatible with cars, SUVs, Pickups, Boats, Motorcycles and etc. Provide overall analysis of batteries’ health and help you know its status in advance before it dies.
Cranking Amps Defined: The 30-Second, 0°F Standard
Cold Cranking Amps (CCA) measures the ability of your battery to start an engine in cold conditions. Specifically, it indicates how much current the battery can deliver for 30 seconds at 0°F (-18°C) while maintaining at least 7.2 volts. This test begins with a fully charged battery, which is then cooled in cold storage to 0°F. After reaching this temperature, a constant load is applied for exactly 30 seconds. If the voltage remains above 7.2V during this period, the battery’s CCA rating is established. This measurement focuses solely on starting power under severe cold, not overall capacity. Different battery chemistries can perform unevenly in cold temperatures, which is why the standardized 0°F test allows for accurate comparison across various models and types. Choosing an appropriate CCA rating for boats ensures reliable starting even in harsh marine environments.