
Getting your boat started after a dead battery can be tricky, but with the right steps, you can do it safely and effectively.
Knowing how to jump-start properly prevents damage to your electronics and gets you back on the water faster.
In this guide, you’ll learn a simple, step-by-step method to safely jump-start your boat, including important safety tips to keep in mind throughout the process.
Gather Marine-Rated Jumper Cables, Gloves, and Safety Glasses
To effectively jump-start your boat, gather three essential items: marine-rated jumper cables, gloves, and safety glasses. Ensuring cable compatibility with your vessel is crucial for a reliable start. Look for jumper cables with tinned copper conductors and sealed, adhesive-lined heat shrink ends, which resist corrosion from salt and moisture. Fine-stranded cable offers the flexibility needed to navigate tight engine compartments. Match the gauge of the cables to your starter’s current requirements; use thicker cables for higher current and keep the length as short as possible to minimize resistance. For quality and performance, consider best battery terminals as a critical component in your boat’s electrical system to ensure solid connections. Using a battery disconnect switch can also provide reliable power control during maintenance or emergencies. Heavy-duty gloves protect your hands from corrosion and sharp edges while providing a secure grip on wet cables. Safety glasses with wraparound design shield your eyes from battery debris and splashes. Remember, these jumper cables are strictly for emergency power transfer and not for regular battery maintenance. Always inspect your cables for cracks and keep all gear dry before making any connections. If the engine still fails to turn over after a successful jump, a tripped circuit breaker may be interrupting power to the starter, so verify and reset it before proceeding.

【Heavy Duty Safe Battery Cables】This 8awg battery cable is made of 266 strands of 0.2mm AS copper wire. 5/16'' ring terminal at each end(already crimped). The cable is an ultra flexible pure copper cable manufactured with a tough, solvent resistant. Please refer to the photo gallery for a cable specification chart ( stranding,voltage,insulation and copper thickness, etc.)

【Heavy Duty Safe Battery Cables】This 6 awg battery cable is made of 423 strands of 0.2mm AS copper wire. 5/16'' ring terminal at each end(already crimped). The cable is an ultra flexible pure copper cable manufactured with a tough, solvent resistant. Please refer to the photo gallery for a cable specification chart ( stranding,voltage,insulation and copper thickness, etc.)

NOONE 16 FEET JUMPER CABLES : 2 Gauge, 16 feet booster battery jumper cables for jump starting dead or weak batteries. Ideal for trucks, SUVs, full-size cars, mid-size cars, and small/compact cars.
Inspect Your Boat Battery for Cracks or Swelling Before You Hook Up
Before hooking up jumper cables, you must inspect your boat battery for cracks, swelling, or leaks. Carefully examine the entire battery casing for any signs of splits, punctures, or bulges. Cracks indicate internal damage and the potential for chemical leaks, which can be dangerous. Swelling or warping of the case usually signals overcharging or gas buildup, making the battery unsafe to jump. Check around the terminals and tray for wetness or residue, as electrolyte leakage releases corrosive fumes that can damage your boat or pose health risks. If you notice any cracks, swelling, leaks, or corrosion, do not attempt to test or jump-start the battery. Instead, replace it immediately to prevent further damage or safety hazards. Also, be alert for a rotten-egg odor or excessive heat, which suggest internal failure. In such cases, disconnect, remove, and dispose of the damaged battery properly; it’s not worth risking an accident. For a safe connection, you should also have quality wire strippers on hand to prepare any replacement cables precisely. To ensure your connections are secure, always follow correct routing and connections when attaching new battery cables. Any loose or corroded connection at the battery posts can also create arcing and heat during the jump-start process, so tighten all clamps firmly before proceeding.
Park Both Boats So Your Jumper Cables Reach Safely
To ensure safe boat-to-boat jumper cable connection, position the boats with a stable side-by-side or angled alignment, maintaining a controlled gap to prevent hull contact. Make sure the boats are stationary, engines turned off, and in neutral before positioning. Keep enough slack in the cables to avoid tension from wake or drift, but not so much that they sag or become tangled. Route the cables along the shortest practical path to minimize resistance and clutter, avoiding sharp edges, rails, or hot engine parts. Keep the cables clear of propellers to prevent damage or accidents. Secure the vessels with lines or station-keeping devices to maintain stability throughout the process. Clear loose gear from decks for safety, and confirm easy access to both battery compartments while ensuring proper ventilation. For optimal lithium battery charging during the restart, consider a solar charge controller to regulate voltage and prevent overcharging. Marine batteries typically fail when exposed to extreme heat above 120°F, which can permanently damage internal components. Using a battery tray can also help secure the battery and prevent vibration damage during transit.

【High Quality】A ABIGAIL battery cables are made of pure copper and tinned copper lugs with superior corrosion and oxidation resistance, which improves the oxidation resistance of copper and maintains its conductivity better.
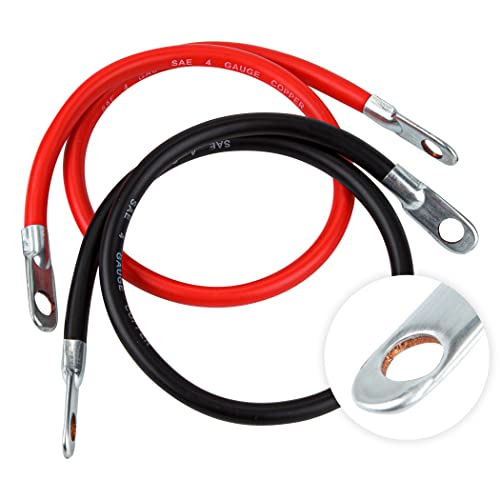
4 AWG wire, fits 3/8" stud, SAE 4 GAUGE COPPER
【High Quality】A ABIGAIL battery cables are made of pure copper and tinned copper lugs with superior corrosion and oxidation resistance, which improves the oxidation resistance of copper and maintains its conductivity better.
Connect Jumper Cables: Red First to Dead Battery, Black Last to Ground
To connect the black jumper cable to a secure ground point, first attach one black clamp to the donor battery’s negative terminal. For the final clamp, instead of connecting it to the dead battery, find a clean, unpainted metal surface on your boat, such as an engine block bolt. Clamping here helps direct any sparks away from the battery itself, reducing the risk of explosion or fire. Make sure all clamps are kept separated from each other and from metal surfaces to avoid accidental short circuits. Unlike lead acid batteries, AGM batteries are sealed and more resistant to vibration, making them a safer choice for marine environments. For optimal performance on the water, a 200w portable solar panel can reliably recharge your battery bank even in low sunlight. For the best results, consider pairing your setup with a 100w solar panel to keep the battery charged when the engine is off.
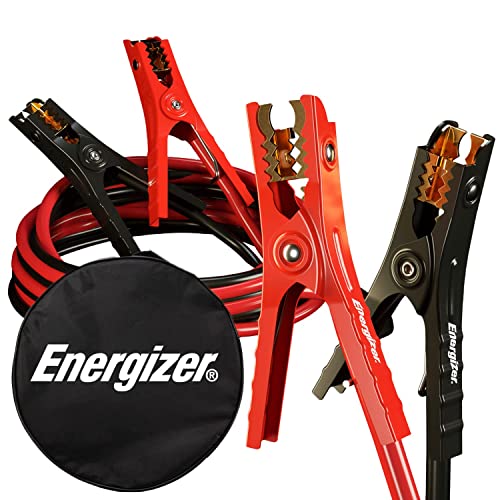
ENERGIZER 16 FEET JUMPER CABLES - 6 Gauge, 16 FT booster battery jumper cables for jump starting a dead or weak battery. Ideal for trucks, SUVs, full-size cars, mid-size cars and small/compact cars
4 AWG wire, fits 3/8" stud, SAE 4 GAUGE COPPER

A must-have for all PWC users
Why the Last Black Clamp Must Connect to a Ground Point, Not the Battery
The black clamp must connect to a ground point, not the battery. This is because the last connection made is the one most likely to produce a spark as the circuit completes. Lead-acid batteries can release hydrogen gas, which is highly flammable, especially during venting. Attaching the black clamp to an unpainted metal surface such as the engine block or chassis helps move any potential spark ignition away from the battery case, significantly reducing the risk of explosion. Many modern battery testers include a load test function that verifies battery health and further reduces the need for risky direct terminal contact. Completing the circuit through the vehicle’s metal structure provides a safe return path that avoids contact with fuel lines or sensitive components. It also minimizes the chance of accidentally touching the battery terminal, which could cause a short circuit or spark. Using a battery disconnect switch helps you isolate the battery safely before jump starting, adding an extra layer of protection. Always select a clean, bare metal surface for this final connection to ensure a secure and safe grounding point. For boat owners, understanding that a Group 24 battery typically weighs between 40 and 50 pounds helps confirm the battery is securely mounted before making any connections.
Start the Boat in Short Bursts: Wait 30 Seconds Between Tries
Start the boat in short bursts: crank the engine for only 3 to 5 seconds each time. This prevents the starter from overheating and avoids draining your jump box. Battery chemistry is optimized for brief, high-current bursts, so prolonged cranking can cause voltage fluctuations and stress both batteries.
Wait at least 30 seconds between each attempt. This pause allows the jump starter’s internal battery to recover and reduces the risk of voltage sag on the next try. Limit your cranking attempts to three to five cycles. If the engine still doesn’t start after that, it’s likely an issue with fuel, ignition, or safety switches, not a dead battery. Using short bursts aligns with your engine’s brief starting demands and helps protect your equipment.
Disconnect Cables in Reverse Order Once the Engine Runs
Once the engine is running smoothly, disconnect the jumper cables in the reverse order of connection. First, remove the black clamp from the grounded metal surface or engine block. This reduces the risk of sparks near the battery. Next, take off the black clamp from the donor battery. Then, remove the red clamp from the donor vehicle’s battery. Finally, disconnect the red clamp from your boat or vehicle battery. Keep the clamps separated to prevent them from touching and avoid letting them dangle near the terminals. Never let the clamps contact engine parts or other metal surfaces. Following this sequence ensures safe disconnection, minimizes the chance of sparks or shorts, and protects your electrical system. Always disconnect in the reverse order to avoid dangerous sparks, as per the proper technique. Using tools with secure tension settings can prevent accidental clamp dislodging during this process. Before stowing the cables, check for any damaged insulation and make sure the clamps are not near moving parts or hot surfaces. For long-term safety, consider upgrading your system with a master switch for battery to provide a reliable cutoff point. Proper removal maintains safety and prevents damage to your batteries and engine components. Choosing a high-quality crimping tool for any future cable repairs ensures a durable connection that withstands vibration and corrosion.
Recharge the Boat Battery With 20 Minutes of Elevated RPM
Running the engine at idle after a jump start isn’t enough to fully recharge your battery. Your alternator needs to run at higher RPM—around 1,500 RPM—to effectively push a charge into the battery. Holding this elevated RPM for about 20 minutes allows the alternator to deliver roughly 16 amp-hours of charge. While this won’t fully restore a deeply discharged or large bank of batteries, it provides enough power to ensure you can restart later. Remember, this method is a quick fix and not a substitute for proper charging with dedicated equipment. For a thorough recharge, especially after a deep discharge, plan to connect to shore power or a proper charger as soon as possible. The actual marine battery weight can vary significantly based on its type and capacity, affecting how you handle and secure it during charging.
Three Marine Jump Start Mistakes That Fry Your Boat’s Electronics
To avoid frying your boat’s electronics when jump-starting, follow these key steps. First, never reverse polarity. Connect the positive cable to the positive terminal first, then attach the negative clamp to a grounded, unpainted metal surface such as the engine block. Avoid clamping directly onto the battery post for the negative connection, as poor grounding risks damaging sensitive components like the ECM, gauges, and voltage regulators. Second, always turn off all electronics and accessories before attaching the jump cables. Powered circuits can produce a voltage spike when clamps are connected, which can fry delicate modules. Third, limit your cranking time and do not rely on a failing battery. Use short bursts of starting power, as prolonged cranking can overheat the starter or voltage regulator, causing damage. Also, inspect the cables to ensure their insulation is intact; frayed or damaged cables can lead to erratic voltage spikes. If the battery is swollen, leaking, or visibly damaged, skip jump-starting altogether and opt for towing to prevent electronic damage. Using a smart battery charger designed for deep cycle batteries can help restore a deeply discharged battery without causing voltage spikes.
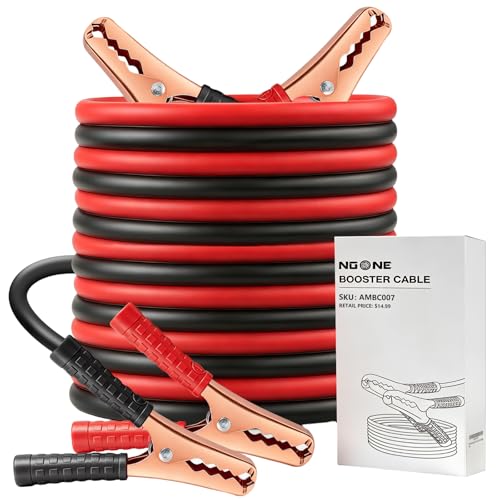
UNIVERSAL FITMENTS :NOONE 10 FT car jumper cables support 200A peak current for jumping start 12/24V car battery. So NOONE booster cables are suitable for your vehicles with up to 3.0 L Gas Engines

4-in-1 Device - Jump starter, wireless charging pad, USB charger, and LED light

HEAVY-DUTY 4 AWG BATTERY CABLE: Includes one 4 AWG red (positive) and one 4 AWG black (negative) cable with 5/16" (M8) tinned copper ring terminals crimped on both ends; Made for DC use up to 1000V; Also perfect for use with a Spartan Power ANL fuse kit